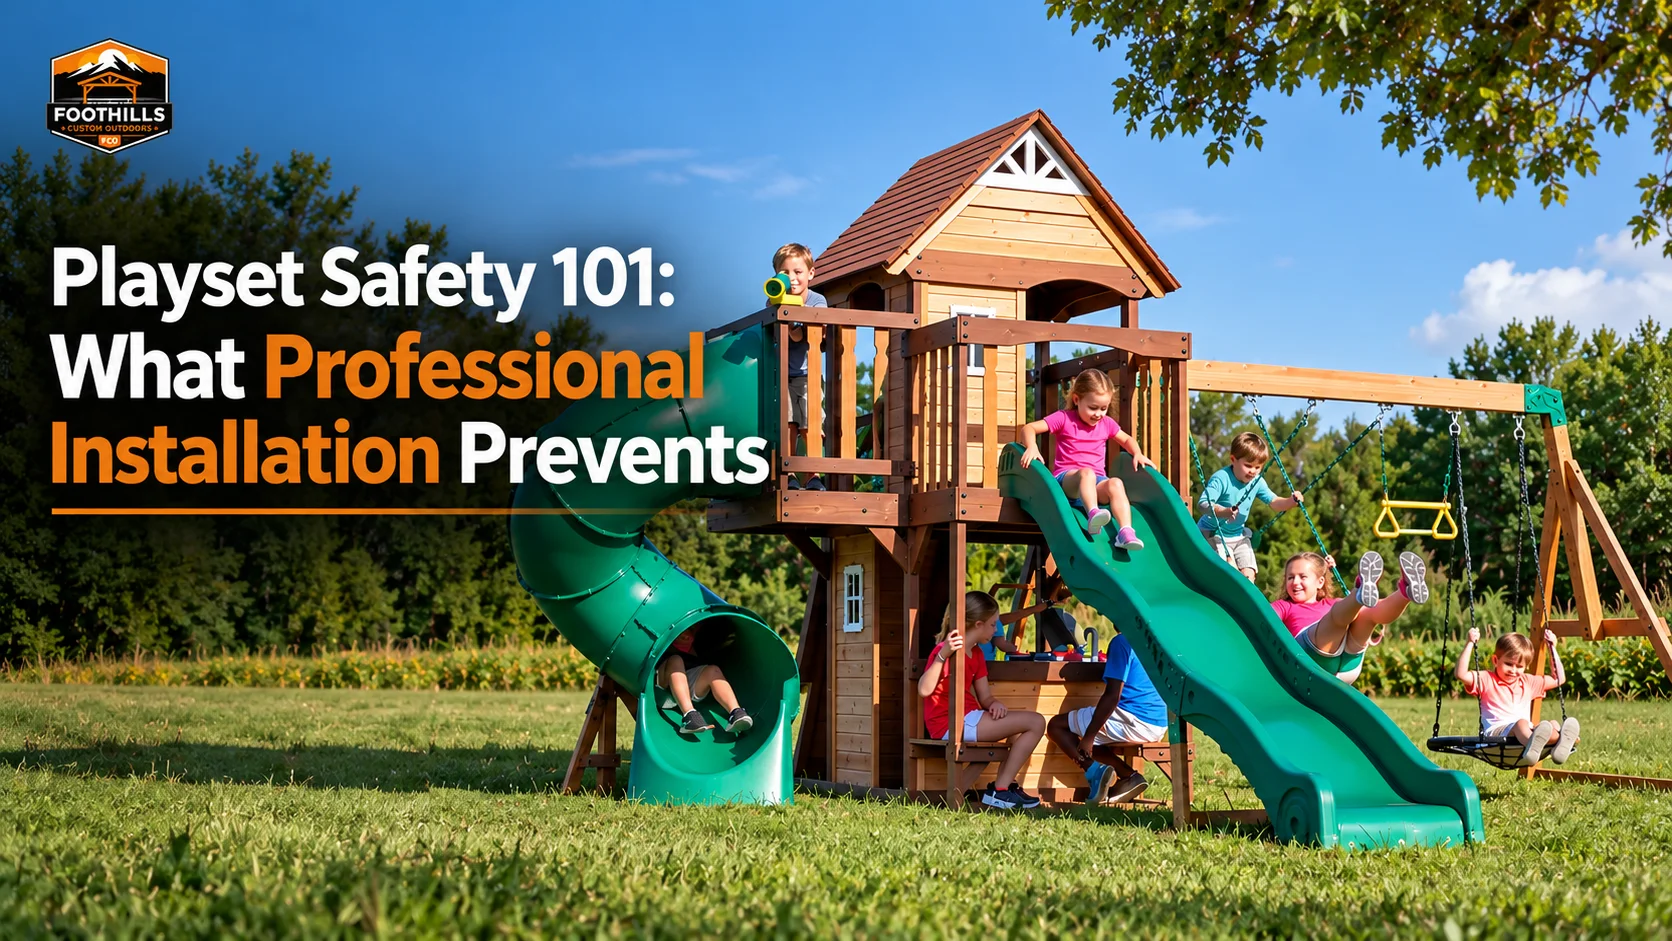
Playset Safety 101: What Professional Installation Prevents That DIY Often Misses
The CPSC estimates that roughly 220,000 children are treated in US emergency rooms every year for playground-related injuries. The vast majority of those happen on commercial playgrounds, but residential backyard playsets contribute meaningfully to the number. The common thread in the preventable backyard cases is not the equipment itself. It is the installation.
A playset assembled correctly to manufacturer specification, with proper anchoring, correct spacing, verified fastener torque, and adequate fall surfacing, is one of the safest places a child can play in your yard. The same playset assembled with the specific errors a DIY builder is most likely to make, under-anchored, out of square, with half-inch too-tight entrapment gaps or inadequate fall zones, is a slow-motion safety problem that announces itself months or years after the installation is done.
This guide walks through the 14 specific failure modes professional playset installation catches that DIY installations most commonly miss. It is written for Knoxville-area parents thinking about hiring a professional installer, parents who have already DIY’d a playset and want to verify it was done safely, and parents still weighing the install path for a playset about to arrive. Every failure mode below is specific, verifiable, and ties back to CPSC Public Playground Safety Handbook guidance or ASTM F1148 residential equipment safety standards.
By the end of it, you will know exactly what to inspect, what to ask any installer, and what the real difference is between a safe playset and a dangerous one.
How Do I Know If a Swing Set Is Installed Safely?
The direct answer, then the detailed one.
The quick-check version: Push firmly on each corner post. The playset should not rock, wobble, or lift. Measure the fall zone around every climbing feature; it should be at least 6 feet in all directions. Check the gap under every swing seat; it should be at least 8 inches above the surface at rest. Look for any opening between 3.5 and 9 inches wide anywhere a child’s head could fit; those openings should not exist. Walk the structure looking for exposed sharp hardware, splinters, or protruding bolts.
The complete version: The full safety inspection that a professional installer performs at handoff covers roughly 45 to 60 verification points. The 14 failure modes below are the ones that most commonly go wrong when the installation is handled by someone without the specific training. If you can confirm all 14 are addressed correctly in your installation, the playset is almost certainly safe. If any one is unverified or incorrect, that is where to focus.
The 14 Failure Modes Professional Installation Prevents
Failure Mode 1: Insufficient or Incorrect Anchoring
What DIY builders miss: anchoring intended for routine wind that falls short of actual Tennessee storm conditions. The manufacturer-supplied anchors are typically rated for average residential wind, not the 55 to 70 mph gusts Knoxville sees several times per summer. Many DIY installations use fewer anchors than specified, drive them to inadequate depth, or install them at the wrong angle.
What professional installation does differently: evaluates the specific site for wind exposure, specifies the correct anchoring hardware (manufacturer anchors for sheltered sites, upgraded engineered anchoring for exposed hilltop or foothill locations), installs each anchor to specification, and stress-tests the finished installation. The anchoring and wind protection engineering service from Foothills Custom Outdoors handles this phase as site-specific engineering rather than a one-size-fits-all step.
Consequence if missed: structural shifting over time, wobble that develops into visible lean, and in severe cases playset movement during storms.
Failure Mode 2: Entrapment Gaps in Openings
What DIY builders miss: openings between 3.5 and 9 inches wide anywhere on the structure where a child’s body could pass through but the head could become trapped. CPSC Public Playground Safety Handbook guidance explicitly prohibits openings in this range because they are the entrapment hazard that causes the most serious injury outcomes.
What professional installation does differently: every opening gets measured with a go/no-go gauge. Openings in the prohibited range are either closed off with blocking, modified with hardware adjustments, or reported to the manufacturer for a design correction.
Consequence if missed: head entrapment, which is the mechanism behind many of the most serious residential playground injuries.
Failure Mode 3: Hardware Not Torqued to Specification
What DIY builders miss: “hand tight plus a bit more” rather than the manufacturer-specified torque at every fastener. A DIY builder with a cordless drill rarely has a calibrated torque wrench for the lag bolts and structural fasteners that matter most. Under-torqued fasteners loosen within the first year; over-torqued fasteners can crack wood or strip threads.
What professional installation does differently: every structural fastener is torqued to the manufacturer specification using a calibrated torque wrench. The 30-day retorque is handled either by the installer or built into the handoff documentation so the homeowner can verify it.
Consequence if missed: developing wobble, hardware failure during use, and compromised structural integrity that worsens over time.
Failure Mode 4: Structure Not Properly Squared
What DIY builders miss: squareness verified only by checking the corners rather than measuring the diagonals. A playset frame that is a half-inch out of square across the diagonal looks correct to the eye but causes swing motion problems, uneven deck loading, and structural stress at every joint for the life of the playset.
What professional installation does differently: diagonal measurement at every phase of the build. Before the deck framing goes on, the base frame is measured corner-to-corner across both diagonals; the measurements must match within manufacturer tolerance (typically 1/4 inch).
Consequence if missed: doors and gates that do not swing properly, swings that drift to one side at rest, uneven wear on components, and premature structural failure.
Failure Mode 5: Inadequate Fall Zone Clearance
What DIY builders miss: safety clearance measured only around the playset footprint rather than the full use zone. CPSC guidance calls for at least 6 feet of clear fall zone in all directions from any raised deck or climbing feature, and 12 feet in front of and behind swing beams measured from the swing’s pivot point to the full arc extent. Many DIY installations place the playset too close to fences, trees, patios, or other structures to meet these clearances.
What professional installation does differently: the fall zone is measured and marked before the playset is positioned. If the site cannot accommodate full fall-zone clearance, the installer either repositions the playset, downsizes the equipment, or clearly flags the limitation to the homeowner before installation.
Consequence if missed: falls that terminate on hard or unforgiving surfaces (fences, patios, trees) rather than within the designated safe fall zone.
Failure Mode 6: Insufficient or Wrong Fall Surfacing
What DIY builders miss: fall surfacing (engineered wood fiber, rubber mulch, poured rubber, pea gravel) at inadequate depth or wrong type. CPSC specifies at least 9 inches of loose-fill surfacing for playsets with decks over 5 feet high. Many DIY installations have 2 to 4 inches of mulch, which is cosmetic rather than protective.
What professional installation does differently: calculates the required surfacing depth based on the fall height of the tallest deck, confirms the correct material type, installs or coordinates installation to the specified depth, and typically includes a perimeter containment border to keep the surfacing in place.
Consequence if missed: fall injuries that would have been minor on correct surfacing become serious on inadequate surfacing.
Failure Mode 7: Swing Spacing Errors
What DIY builders miss: swings installed too close to each other, too close to support posts, or at wrong height above the ground. CPSC specifies at least 24 inches between adjacent swings on the same beam and at least 30 inches between a swing and any support post. Swing seats should be at least 8 inches above the ground at rest to prevent dragging.
What professional installation does differently: every swing position measured and set to specification before swings are hung. Swing beam height verified. Chain length adjusted to deliver the correct seat height.
Consequence if missed: children colliding with each other mid-swing, swings striking support posts, and swing seats dragging on the ground causing accelerated wear.
Failure Mode 8: Slide Installation Angle and Exit Height Errors
What DIY builders miss: slide installed at the wrong angle (either too steep or too shallow) or with the exit end at the wrong height above the ground. CPSC guidance calls for slide exit height between 7 and 15 inches above the surface, with a horizontal exit ramp that slows the child before leaving the slide.
What professional installation does differently: slide angle verified during assembly. Exit height measured and adjusted. Any hardware required for proper exit geometry installed to specification.
Consequence if missed: slide exits that launch children too fast or too high above the surface, causing exit falls that drive many residential slide injuries.
Failure Mode 9: Exposed Sharp Edges and Protruding Hardware
What DIY builders miss: bolt heads and threads protruding past nuts, splinters on wooden components that were not sanded during assembly, metal edges not deburred, and screws left exposed where children’s hands or clothing will contact them.
What professional installation does differently: every exposed fastener trimmed, capped, or recessed. Wooden components inspected for splinters and sanded as needed. All contact surfaces smoothed. Protective end caps installed where included.
Consequence if missed: lacerations, puncture wounds, splinter injuries, and clothing snags that can cause falls.
Failure Mode 10: Foundation Problems Not Caught Before Assembly
What DIY builders miss: installation proceeding on ground that is unlevel, poorly drained, or structurally unstable. A playset built on soft soil, over a buried stump, or on a slope that was not properly leveled develops settling problems within the first year.
What professional installation does differently: full site evaluation before the first component goes on the ground. Level verified across the entire playset footprint using a laser or spirit level. Drainage assessed. Underground obstructions identified. Any site preparation deficiencies addressed before assembly begins.
Consequence if missed: playset settling, visible lean within 12 to 24 months, structural stress that compounds over time, and sometimes complete reassembly required.
Failure Mode 11: Missing or Substituted Hardware
What DIY builders miss: finishing the assembly despite missing hardware by substituting incorrect fasteners from the garage or a hardware store. The manufacturer-specified hardware is often engineered for specific load requirements; a shorter, thinner, or different-grade substitute may hold initially but fails earlier.
What professional installation does differently: full inventory check against the manufacturer parts list before assembly begins. Missing or damaged hardware sourced from the manufacturer or dealer before proceeding. No substitutions that compromise specification. As an authorized Backyard Discovery dealer, Foothills Custom Outdoors has direct access to replacement parts, which keeps the specification intact when inventory issues arise.
Consequence if missed: hardware failure months after installation when the substituted fastener finally gives way under load.
Failure Mode 12: Overhead and Underground Obstructions
What DIY builders miss: installation under tree branches that will drop during storms, over buried sprinkler lines or electrical conduit, or near overhead power lines. CPSC guidance calls for 8 feet of clear overhead space above any deck or climbing surface.
What professional installation does differently: site walk includes overhead and underground obstruction evaluation. Branches that fall within the clearance envelope are flagged for trimming before installation. Underground obstructions marked (homeowner responsibility via 811, but confirmed by installer) are respected during anchoring.
Consequence if missed: falling branches damaging the playset or children, anchor installation hitting buried utilities, and ongoing debris cleanup under the playset.
Failure Mode 13: Age-Appropriate Equipment Mismatches
What DIY builders miss: installing equipment with features sized or rated for an age group different from the children actually using it. CPSC distinguishes between preschool-age equipment (ages 2 to 5) and school-age equipment (ages 5 to 12). Deck heights, climbing feature complexity, and swing seat types differ meaningfully between the two categories.
What professional installation does differently: confirms during the site walk that the playset model matches the age range of the children. For families with children spanning both age categories, discusses the specific risks of installing school-age equipment that preschoolers will also use.
Consequence if missed: younger children attempting features designed for older ones, resulting in fall-height and skill-mismatch injuries.
Failure Mode 14: No Documentation or Verification at Handoff
What DIY builders miss: no written confirmation that the installation was completed to specification. No safety walkthrough. No maintenance schedule. No warranty documentation. The DIY builder walks away from the finished playset without the paperwork that supports future warranty claims or verifies the install was done correctly.
What professional installation does differently: full handoff documentation including safety inspection confirmation, maintenance schedule, warranty paperwork, and photos of the finished installation. The professional playset assembly service walkthrough covers every element from inventory through final inspection and documentation.
Consequence if missed: warranty claims denied due to lack of installation documentation, uncertainty about whether specific safety elements were verified, and no reference point for the 30-day retorque or annual inspection schedule.
What Safety Issues Come From DIY Playset Assembly?
The failure modes above sort into three categories of real-world consequence.
Immediate safety issues (hazard present on day one):
- Entrapment gaps in the prohibited 3.5-to-9-inch range
- Exposed sharp hardware and splinter risks
- Swings too close to posts or each other
- Slides with incorrect exit geometry
- Inadequate fall surfacing under climbing features
- Fall zones encroached by fences, trees, or hard surfaces
Progressive safety issues (develop over 6 to 24 months):
- Hardware loosening from inadequate torque
- Wobble from inadequate anchoring
- Structural lean from site that was not properly leveled
- Component wear from an out-of-square frame
- Settling from improper foundation preparation
Long-term safety and liability issues (develop over 2 to 10 years):
- Hardware failure from substituted or incorrectly specified fasteners
- Wood rot from drainage problems that were not addressed
- Anchor shifting from freeze-thaw cycles on shallow anchoring
- Warranty voidance from unauthorized modifications made during assembly
- Insurance coverage questions in the event of a serious incident
A DIY installation does not automatically fail all 14 safety checks. Many DIY builders catch most of them. The problem is that even catching 10 of 14 leaves four specific hazards present on a structure that children use daily. The margin for error on backyard playground safety is narrower than on most home projects.
How Is a Swing Set Anchored on Uneven Ground?
Anchoring on uneven or sloped ground is one of the areas where DIY installations most commonly go wrong, and East Tennessee has more uneven lots than most regions due to the foothill terrain across Blount, Sevier, and eastern Knox counties. Four approaches work.
Approach 1: Level the install area first
The cleanest answer for most sloped sites. Cut and fill, or build up a leveled pad, before any anchoring work begins. Once the install area is level, standard anchoring applies.
Approach 2: Variable-depth anchoring with the frame level
The uphill anchors are installed to standard depth; the downhill anchors go deeper to compensate for the lower ground surface, keeping the playset frame itself level while the anchors below sit at different depths. Requires engineering judgment to specify correctly.
Approach 3: Retaining wall and leveled pad
For significant slopes, a short retaining wall holds back uphill soil and creates a defined flat pad for the playset. More expensive but delivers the strongest long-term outcome on steep sites.
Approach 4: Raised deck or platform
Build a leveled wood platform on posts that reach down to level footings, then install the playset on the finished platform. Common for homes where the playset tucks into a sloped section of yard.
For most Knoxville-area sloped-site installations, Approach 1 (leveling the install area) combined with standard concrete footer anchoring is the correct choice. The relevant site preparation and foundation work is handled as part of a full-service installation and covers the leveling, drainage, and anchoring prep in sequence.
Approach 4 is also viable for homeowners who already have a deck or want to integrate the playset with existing hardscape, though it adds meaningful cost.
What does not work on uneven ground: driving stakes into the slope at an angle and hoping the frame stays stable. Soil movement on slopes is more active than on level ground, and improperly anchored playsets on slopes develop problems faster than their flat-site counterparts.
The CPSC and ASTM Standards Behind the Safety Checks
Every failure mode above ties back to a specific published safety standard. The two primary references for residential playset safety:
CPSC Public Playground Safety Handbook (Publication #325): The Consumer Product Safety Commission’s guidance document for playground design and installation. Covers fall zones, surfacing depth, equipment spacing, entrapment prevention, and age-appropriate design. Available free from the CPSC website.
ASTM F1148: The American Society for Testing and Materials standard for consumer safety performance of home playground equipment. Specifies structural requirements, materials, hardware, and performance testing.
Both standards are the technical foundation for professional playset installation. A professional installer references them continuously; a DIY builder may not know they exist. The gap in outcome between the two approaches comes down largely to the specific requirements these documents contain being either followed or not.
Foothills Custom Outdoors handles installations with reference to both standards. The swing sets and playsets installation and assembly service completes a safety inspection against CPSC guidance before every handoff.
The Safety Checklist for Verifying an Existing Installation
If you already have a playset in your yard (whether DIY-installed or professionally installed) and want to verify it is safe, work through this checklist. Any item that fails verification is worth addressing before the next heavy-use season.
Structural checks:
- No wobble, lean, or movement when you push firmly on each corner post
- All visible hardware tight (not finger-loose)
- No visible cracks, splits, or rot in wooden components
- All deck boards securely fastened
- Rails and barriers in place and secure
Anchoring checks:
- Anchors visible at each corner and firmly embedded
- No shifting or settling visible at anchor points
- Base frame level across the full footprint (use a 4-foot spirit level)
- No gaps between the frame and the ground that suggest settling
Hardware checks:
- No bolt heads or threads protruding into the use area
- No exposed sharp edges on metal components
- No splinters on wooden surfaces children contact
- All plastic components (slides, climbing walls) intact without cracks
- Swing chains, ropes, or straps in good condition without visible wear
Spacing and clearance checks:
- Fall zone measurement: at least 6 feet of clear space in all directions from any deck or climbing feature
- Swing zone measurement: at least 12 feet of clear space in front of and behind swing beams
- Overhead clearance: at least 8 feet from any deck or climbing surface to overhead branches, wires, or structures
- Swing spacing: at least 24 inches between adjacent swings
- Swing-to-post spacing: at least 30 inches between any swing and a support post
Surfacing checks:
- Fall surfacing material appropriate for the fall height (loose fill at least 9 inches for decks over 5 feet, less for shorter decks)
- Surfacing extends to cover the full fall zone, not just directly under the playset
- No bare spots or compressed areas under high-use zones
Entrapment checks:
- No openings between 3.5 and 9 inches wide anywhere a child’s body could pass but head could not
- All openings in railings, ladders, and climbing features within safe size ranges
Site checks:
- No obstacles (fences, trees, patio edges) within the fall zone
- No standing water or drainage issues around the base
- No fire ant mounds, hornet nests, or pest issues under the structure
Any item that fails verification is worth addressing. If multiple items fail, consider a professional inspection or re-installation.
When to Call a Professional for an Existing Installation
Some verification failures are fixable by the homeowner. Others benefit from professional evaluation. Here is the dividing line.
Homeowner-fixable:
- Loose hardware that just needs retorquing
- Fall surfacing that needs topping up
- Minor splinters that need sanding
- Obstacles in the fall zone that can be removed
- Overhead branches that need trimming
Benefits from professional evaluation:
- Any wobble that does not resolve with hardware torquing
- Visible lean or settling
- Anchoring that appears inadequate (shallow, few in number, or shifting)
- Entrapment gaps that cannot be easily closed
- Fall zone deficiencies that would require playset repositioning
- Structural components with visible cracks, rot, or damage
For installations that need meaningful attention, re-anchoring an existing playset typically runs $600 to $2,500 depending on the scope of work required, which is dramatically cheaper than the long-term cost of letting a problematic installation continue to deteriorate.
Beyond Installation: Ongoing Safety
Even a perfectly installed playset needs ongoing attention to stay safe. The maintenance cadence that keeps a Foothills Custom Outdoors installation performing for its full 15 to 20 year lifespan:
Monthly during active use:
- Visual walk-through checking for obvious hardware or component issues
- Confirm fall surfacing is at full depth under high-use zones (loose fill compacts and shifts with use)
- Clear leaves, pine straw, and debris from under the structure
Quarterly:
- Hand check every exposed fastener for tightness
- Inspect swing chains, ropes, and straps for wear
- Check deck boards for splinters or splitting
- Verify slides are securely attached at both ends
Annually (ideally in spring):
- Full hardware retorque to specification
- Inspect wooden components for rot, insect damage, or splitting
- Reseal or restain wooden structures (every 2 to 4 years, as needed)
- Replace any worn swing chains, ropes, or hardware
- Check anchor points for shifting or corrosion
- Clean plastic components to remove UV damage
Every 2 to 3 years:
- Replace fall surfacing if it has degraded or compacted significantly
- Consider professional inspection for installations more than 5 years old
- Review age-appropriateness as children grow
A playset that gets this maintenance cadence stays safe. A playset that gets no maintenance drifts out of safe condition even if it was installed perfectly, often within 3 to 5 years.
For families planning the full playset ownership experience, the swing set installation timeline guide covers the installation side in detail, and the swing set assembly cost breakdown covers the pricing side.
The DIY-Versus-Professional Decision Through a Safety Lens
Most DIY-versus-professional comparisons focus on cost and time. The safety angle changes the math meaningfully.
The direct cost difference between a professional installation and a DIY build on a mid-size wooden playset in the Knoxville area typically runs $1,500 to $3,500. That is real money, and for many families the DIY path is a legitimate choice.
The safety math is different because the risk is not symmetric. A DIY installation that misses one or two of the 14 failure modes above may deliver years of problem-free use. Or it may contribute to a serious injury incident that costs orders of magnitude more than the labor savings. The downside is low-probability but high-consequence.
For context on the specific risk patterns and tradeoffs, the DIY swing set assembly risk guide for Knoxville walks through the specific failure modes most common in local DIY installations.
The honest recommendation for most Knoxville families: hire a professional for the installation. For families with genuine construction experience and the patience to work through every one of the 14 failure modes carefully, DIY is a legitimate choice. The hybrid approach (professional foundation and anchoring work, DIY assembly of the upper structure) is also available and captures some labor savings while preserving the safety-critical phases.
For families with a wooden playhouse alongside the playset, the same framework applies and is covered in the wooden playhouse installation decision guide.
Frequently Asked Questions
How do I know if a swing set is installed safely?
Walk the 27-item verification checklist above. Push each corner post firmly to confirm no wobble. Measure the fall zones (6 feet in all directions, 12 feet in front of and behind swings). Check all openings for the 3.5-to-9-inch entrapment range. Verify fall surfacing depth matches the fall height. Confirm no exposed sharp hardware. If all items pass, the installation is almost certainly safe. If multiple items fail, consider a professional inspection.
What safety issues come from DIY playset assembly?
Three categories: immediate safety hazards present on day one (entrapment gaps, inadequate fall surfacing, swings too close to posts), progressive issues that develop over 6 to 24 months (hardware loosening, wobble from inadequate anchoring, structural lean from site that was not leveled), and long-term issues over 2 to 10 years (hardware failure from wrong fasteners, warranty voidance, insurance questions). The specific hazards depend on which of the 14 common failure modes the DIY installation missed.
How is a swing set anchored on uneven ground?
Four approaches work in the East Tennessee foothill terrain. Level the install area first with cut-and-fill (most common), use variable-depth anchoring that keeps the frame level while anchors sit at different depths, build a short retaining wall to create a flat pad, or build a raised deck platform. For most sloped sites, leveling the install area combined with standard concrete footer anchoring is the right choice.
Does professional installation include a safety inspection?
Yes. A proper professional playset installation in the Knoxville area concludes with a safety walkthrough against CPSC Public Playground Safety Handbook guidance and ASTM F1148 standards. Every one of the 14 failure modes discussed above is verified. The inspection covers hardware torque, fall zones, surfacing depth, entrapment gaps, swing spacing, slide geometry, and structural integrity. Documentation of the inspection accompanies the finished install.
What is the most common DIY playset safety mistake?
Inadequate anchoring is the most common and the highest-consequence. DIY builders routinely use fewer anchors than specified, drive them to inadequate depth, or treat anchoring as the finishing step rather than the safety-critical specification it actually is. The failure mode compounds over time: the playset holds up for the first year or two, then develops wobble, then starts shifting in storms. The swing sets and playsets product collection at Foothills Custom Outdoors is paired with installation that handles anchoring as the engineered specification it should be.
What fall surfacing is best for a backyard playset?
CPSC-approved loose-fill options include engineered wood fiber (also called playground mulch), rubber mulch, pea gravel, and sand. For most Knoxville-area residential installations, engineered wood fiber is the best balance of safety, cost, and aesthetics. Rubber mulch is more expensive but longer-lasting. Pea gravel is cheapest but less forgiving on falls. For playsets with decks over 5 feet high, at least 9 inches of loose-fill depth is required. Poured-in-place rubber surfacing is also available at higher cost and delivers excellent fall protection without the loose-fill maintenance.
How often should I inspect my playset for safety?
Monthly visual walks during active use season (checking for obvious issues), quarterly hand-check of fasteners and components, annual full inspection in spring (hardware torque, wood sealing, chain replacement, anchoring check), and every 2 to 3 years consider a professional inspection, especially for installations more than 5 years old.
Can a child’s swing set be installed safely over an existing patio?
Not typically. Patios are hard surfaces, which fail the fall-surfacing requirements for any playset with a deck or climbing feature. Installing a playset on a patio means children falling onto concrete or pavers, which is the opposite of what the fall surfacing exists to prevent. If a patio is the only available flat space, the playset needs either a smaller fall-height specification (compact ground-level play structures only) or significant modification like adding a thick loose-fill surfacing bed over the hard surface.
What is CPSC and what does it have to do with my backyard playset?
The Consumer Product Safety Commission publishes the Public Playground Safety Handbook (Publication #325), which is the primary technical reference for playground safety in the United States. Its guidance applies to both commercial and residential installations. CPSC does not inspect individual backyard installations but publishes the standards that professional installers reference. The specifications in this guide (fall zones, surfacing depth, entrapment gaps, swing spacing) all come directly from CPSC guidance.
Does my playset need to meet ASTM F1148 standards?
Residential playsets sold in the US are typically designed to meet or exceed ASTM F1148 as a product. The installation of that playset is what determines whether the finished setup actually performs to the standard. A product that meets F1148 can still create safety hazards if installed incorrectly. Professional installation includes verification that the finished installation performs as the product was engineered to perform.
What should I ask a potential playset installer about safety?
Five essential questions:
- Do you perform a safety inspection against CPSC and ASTM standards at handoff?
- How do you handle fall zone and surfacing specification?
- What anchoring approach do you use for exposed Tennessee sites?
- Do you measure entrapment gaps during the installation?
- What documentation do I receive at completion?
Any installer who hesitates or provides vague answers on these questions is not treating safety as the specification it should be.
My DIY playset passes the visual check but I’m still worried. What should I do?
Hire a professional for a one-time safety inspection. Many Knoxville-area playset installers offer standalone inspection services for installations they did not originally handle. The cost is typically $150 to $400 and surfaces any issues before they become problems. If the inspection flags meaningful concerns, you can decide whether to address them yourself, hire the inspector to fix them, or in extreme cases, re-install the playset professionally.
Making the Safe Choice
Backyard playsets deliver enormous value to families when installed correctly. They also contribute to serious injuries when they are not. The difference between those two outcomes comes down to the 14 specific failure modes covered above and whether each one was addressed correctly during installation.
A professional installer walks every one of those 14 checkpoints as a matter of standard practice. The anchoring is engineered for your specific site. The entrapment gaps are measured. The fall zones are verified. The hardware is torqued to specification. The handoff includes documentation. None of those elements are impossible for a careful DIY builder to replicate, but none of them are intuitive either, and the cost of missing one or two is asymmetric.
Foothills Custom Outdoors serves Knoxville, Farragut, Hardin Valley, Bearden, Maryville, Alcoa, Sevierville, Oak Ridge, and the broader East Tennessee area as an authorized Backyard Discovery dealer with a complete installation service built around the standards covered in this guide. If you are planning a swing set installation, inspecting an existing installation, or weighing the DIY-versus-professional question through a safety lens, the right starting point is understanding exactly what you are protecting against. The checklist above, the standards it references, and the 14 failure modes it maps are the technical reality underneath every safe backyard playset in East Tennessee. Get the installation right, and the next 15 to 20 years of play are the memory your family deserves.